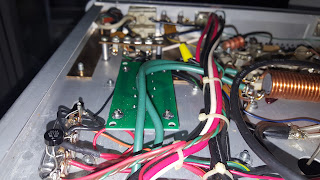
I started my upgrade with the RM-220 meter board. It has missing R2 resistor and Jeff had shipped it along with my FB-220 kit which I ordered later. I didn't think it was necessary to upgrade the capacitors bank but many of my friends suggested it since the amplifier was built 30+ years ago. The capacitors might have dried up. Along with RM-220, I did the FB-220 upgrade too since I need to work on the connection anyway. Anyway, the meter board doesn't require the old zener diode, so I've removed it as per the installation guide.
After the two upgrades, I did a test run just to make sure everything was okay before going for the other upgrades. The HV reading seems to be a okay and as per the original specs. Before the upgrade, the reading were a bit off for both CW and SSB mode.
Satisfied with the HV side upgrades, I went ahead with adding the SS-221-240 upgrade. This requires a lot of works since there are four things need to be done:
- Installing the circuit board (it is upside down since I couldn't find a safest way of installing it and looking at some of the photos found on the net, they're doing the same thing.
- Installing the bridge rectifier.
- Adding transient voltage suppressors ( 390V ZNR suppressors).
- And lastly the diodes across the T/R relay.
The last part before doing another test run was to put in the SK-220 soft key. Its a bit cramp there since there is RF choke installed. The installation guide doesn't warn this though. But I managed to squeezed it in.
Done with all the upgrades, I did a check on all connections and tidy some of the wires with cable tie. I did a power up test run and let it ran for half an hour to see if I any smoke came out and everything went just fine. Put back the casing and now ready for RF test. This will be done when I get my hexbeam fine tuned. Stay tune!


No comments:
Post a Comment